
Installing and Running XAMPP
Windows
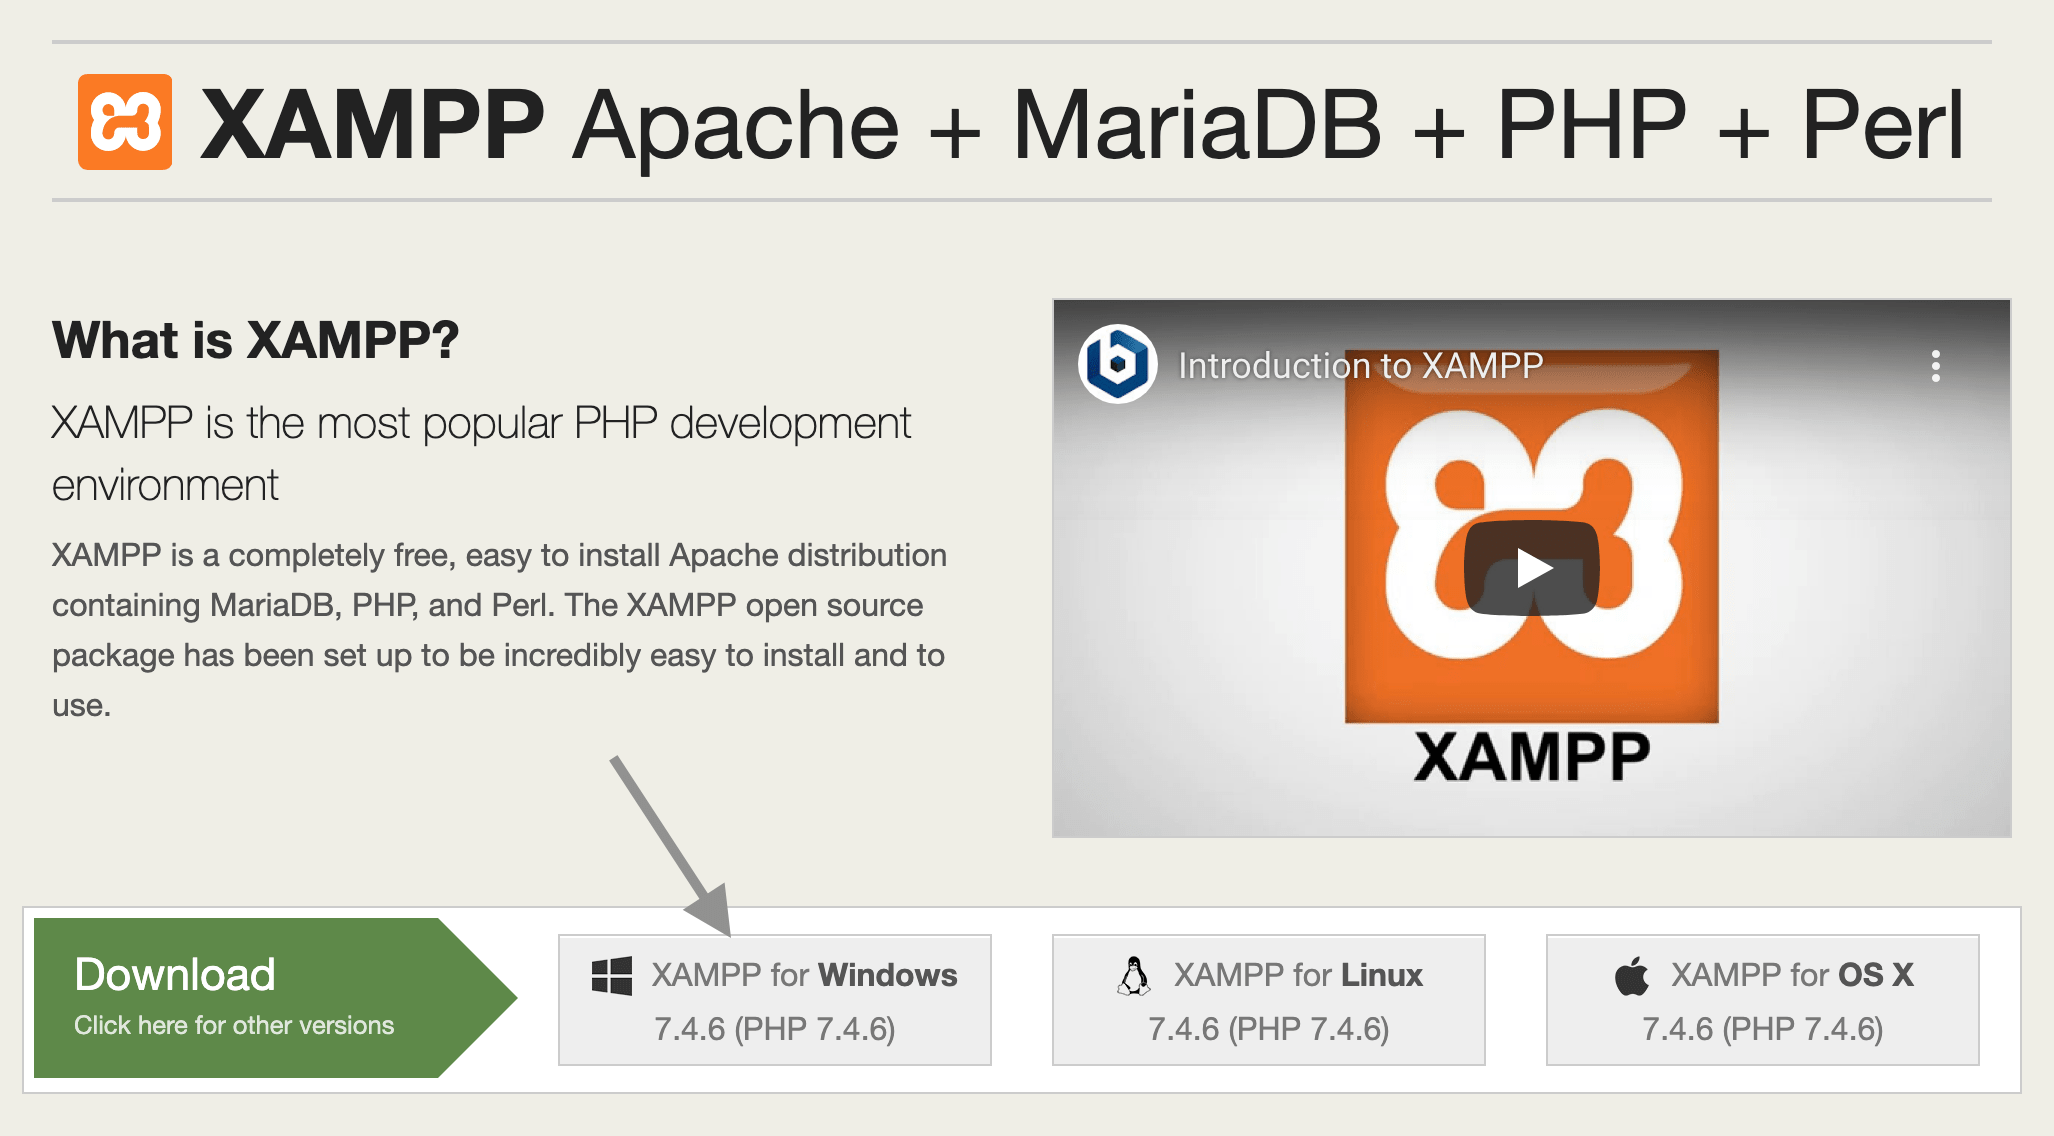
Go to https://www.apachefriends.org/index.html and click on “XAMPP for Windows”.
Wait for the file to download. After downloading, right-click on the downloaded file and select “Run as Administrator”. On the dialog box that pops up instructing you to disable your User Account Control (UAC), click “OK”.
Follow the installation wizard and click “Next” to proceed when prompted. When prompted to select an installation folder, make sure C://xampp is selected as the installation location. Keep clicking “Next” until the installation begins. Once the installation is over, click the “Finish” button.
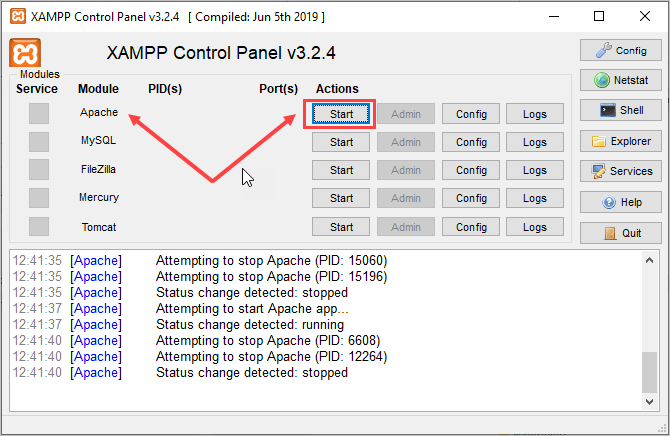
Go to the C://xampp folder and double-click on the xampp-control.exe file.
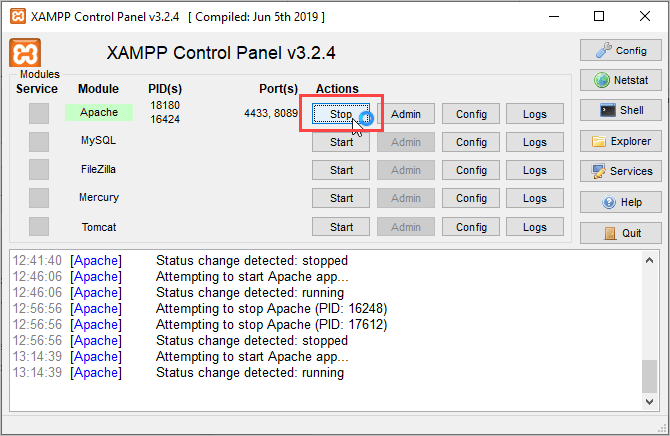
To start any module, click on the Start button next to the module. To stop it, click on the Stop button. For instance, to start/stop the Apache web server module, click on the Start/Stop button next to Apache.

Mac
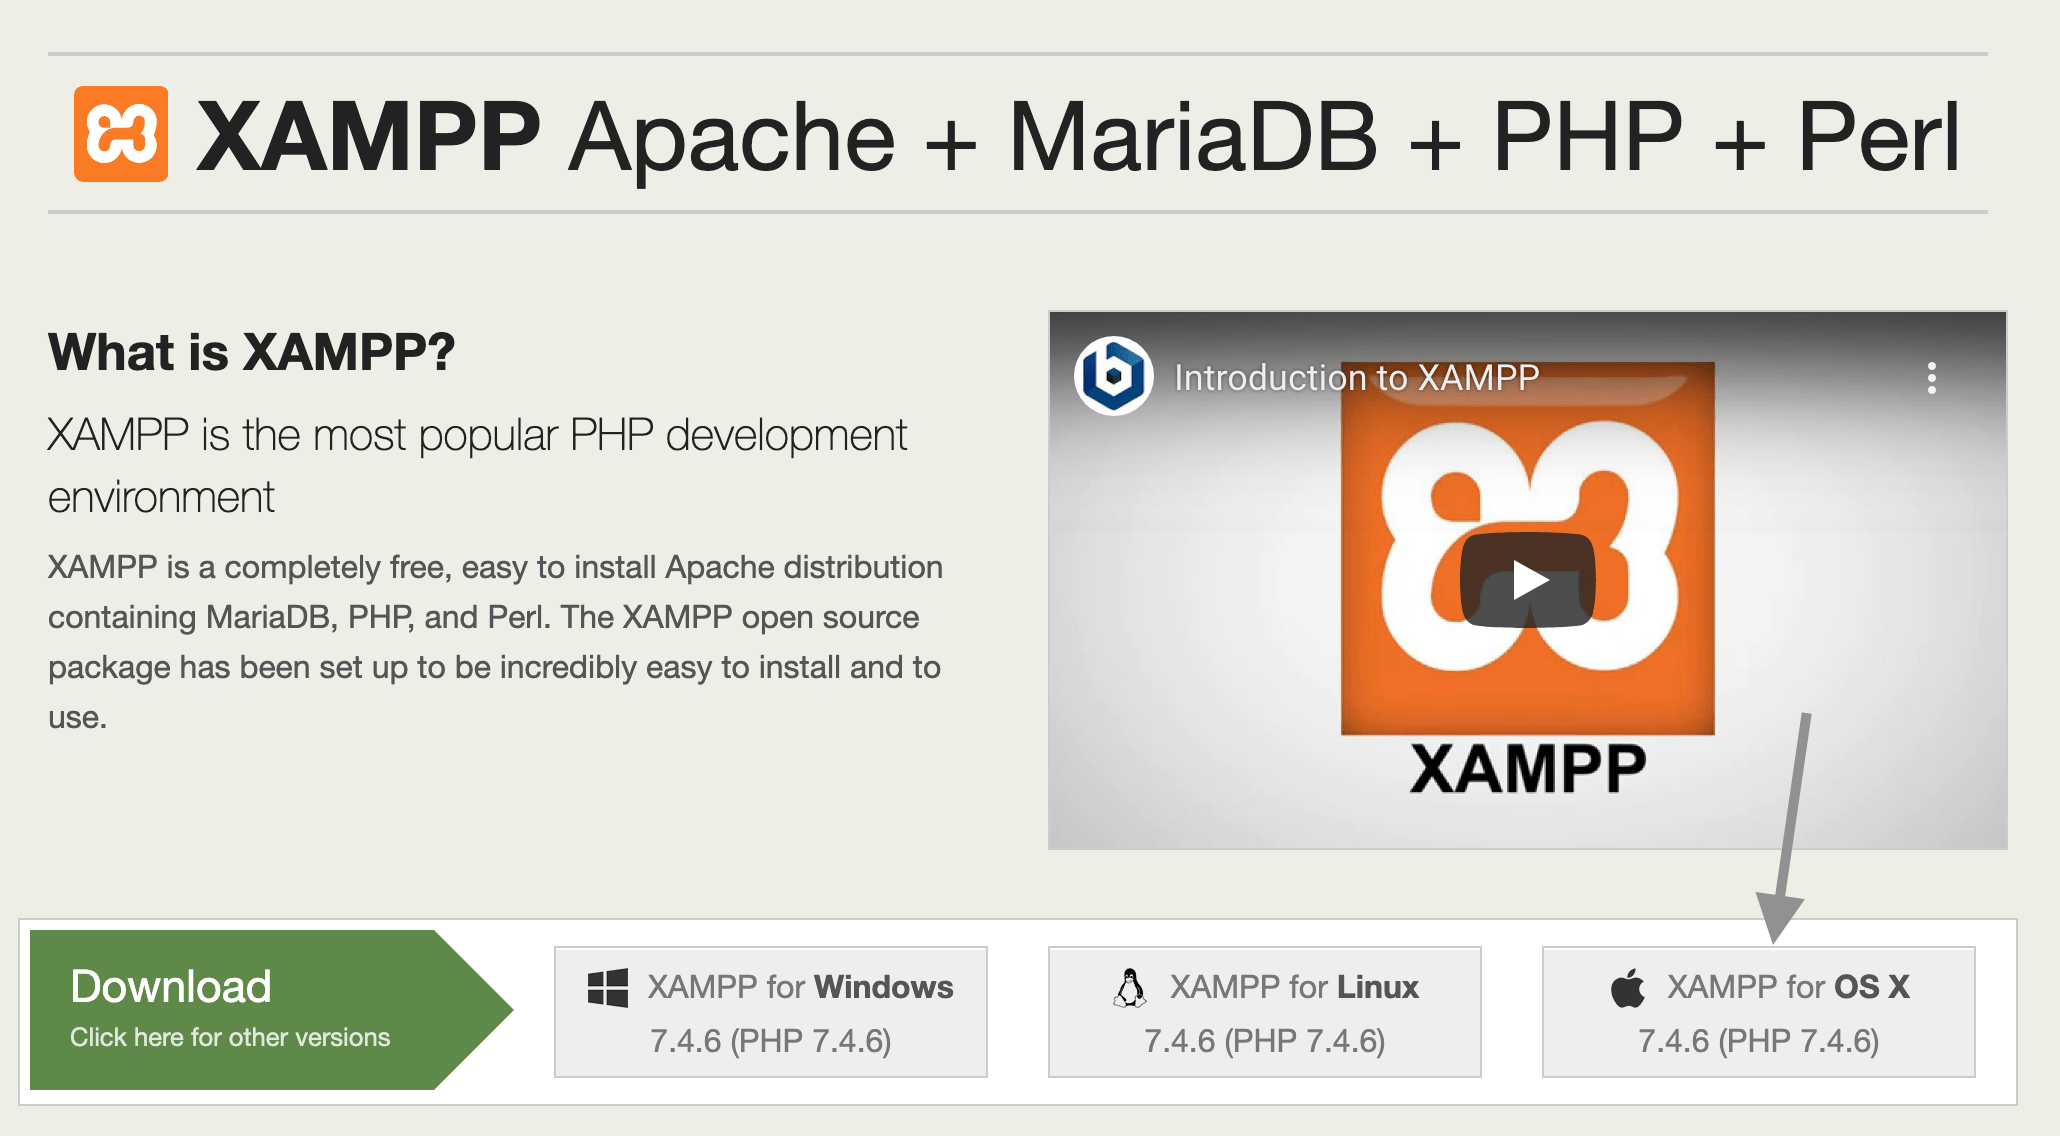
Go to https://apachefriends.org/index.html and click on “XAMPP for OS X” to download the installer.
After it is downloaded, double click to run it. When prompted, drag XAMPP to the Applications folder.

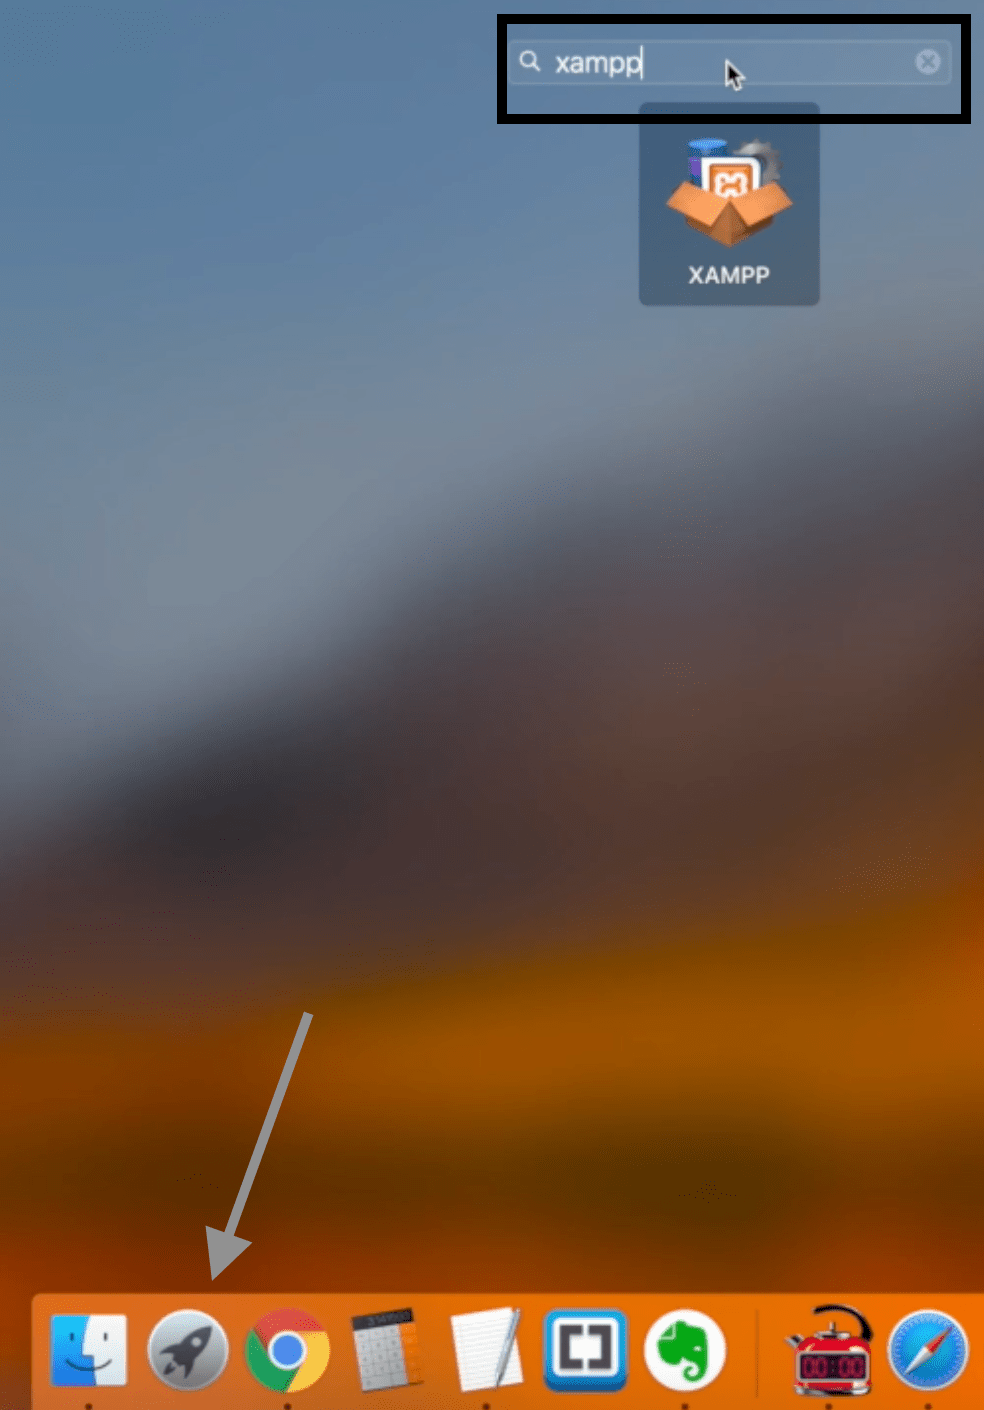
To launch XAMPP, click on Launchpad and search for XAMPP.
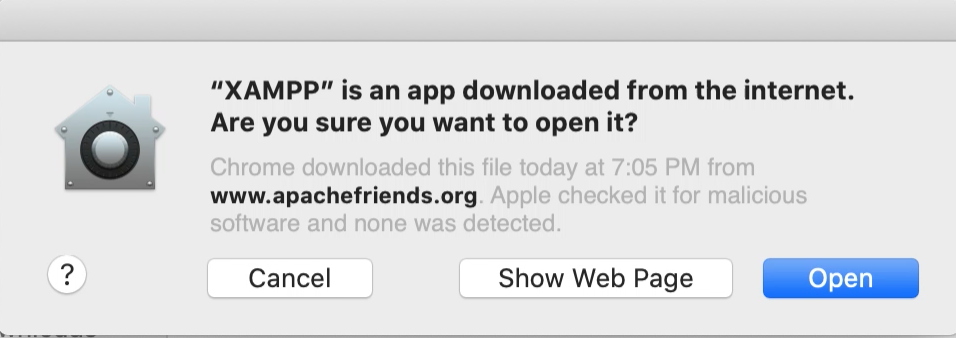
Click on it to launch XAMPP. When presented with the following warning, click “Open” to proceed.
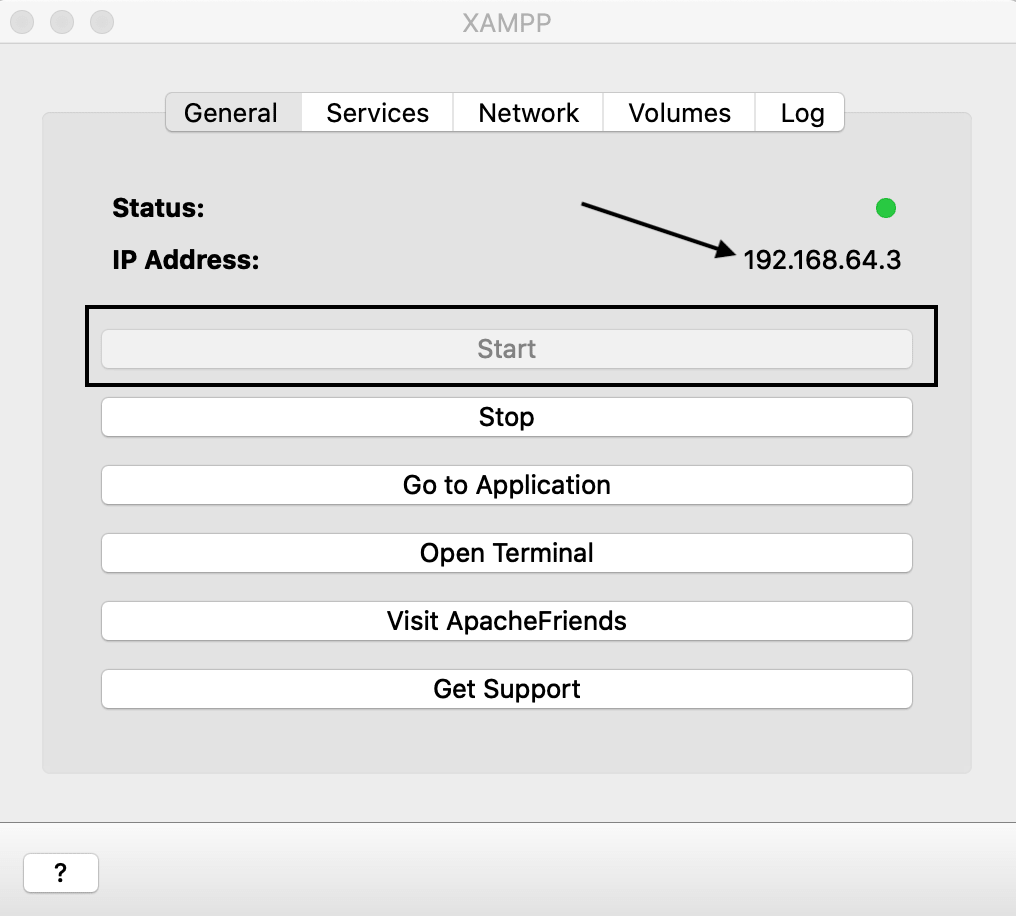
In the “General” tab, click Start to start XAMPP. Wait for the status to turn green. You’ll see the IP address listed.
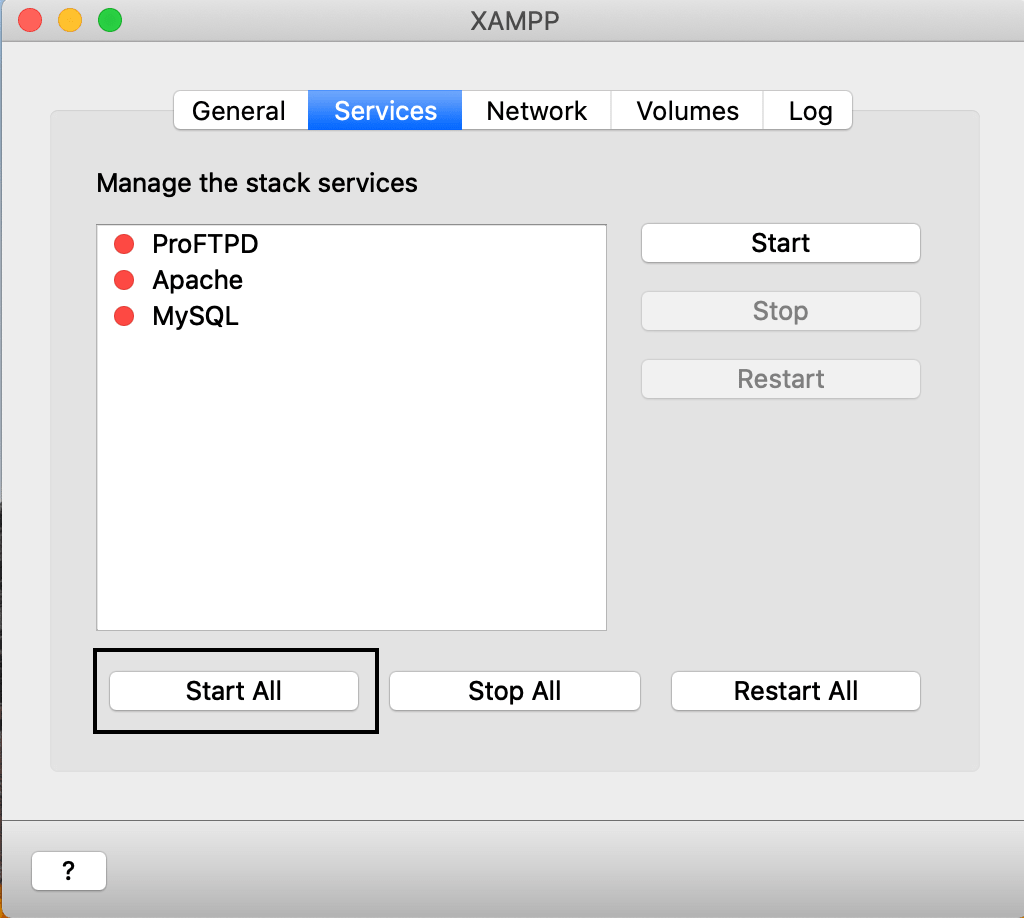
Next, click on the “Services” tab and click Start All to start all the services.
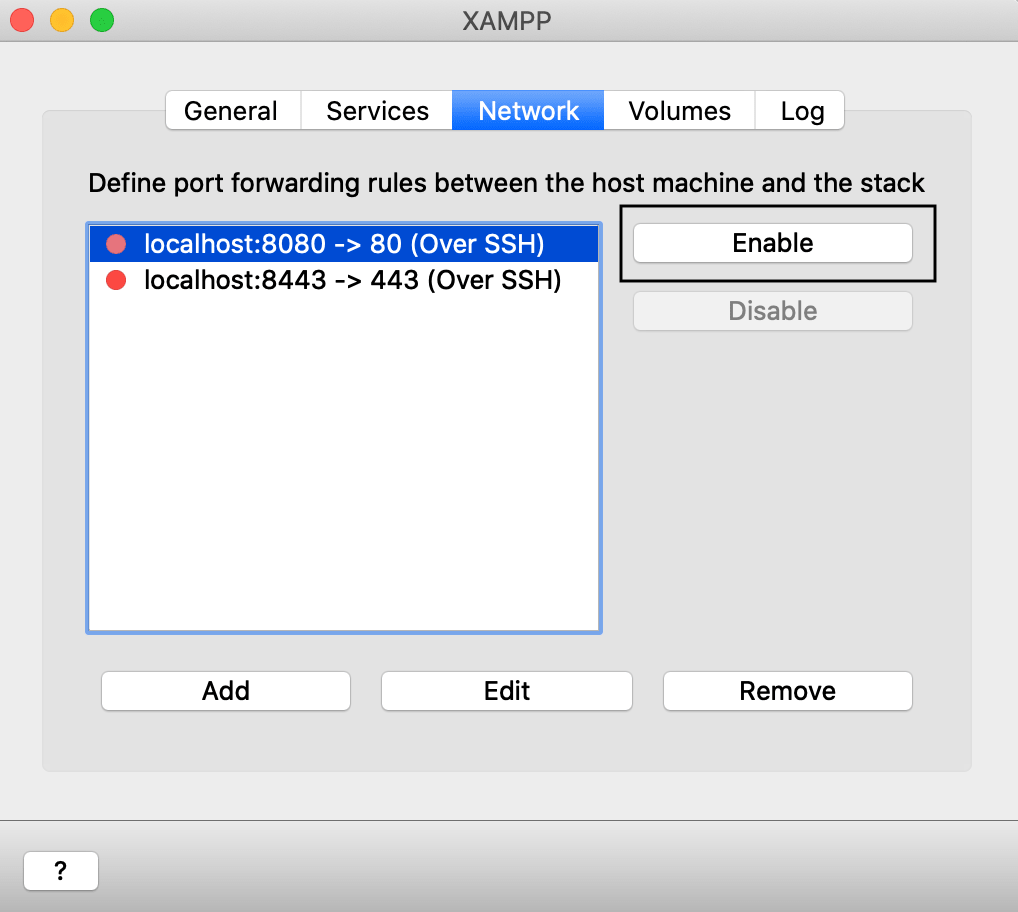
Then, click on the “Network” tab to enable port forwarding. If you do not enable port forwarding, you need to use the IP address to load the files in your localhost. For instance, if the IP address is 192.168.64.3 (this can be found in the “General” tab), you have to type http://192.168.64.3 into your browser’s address bar. If you enable port forwarding, you type http://localhost:8080 instead.
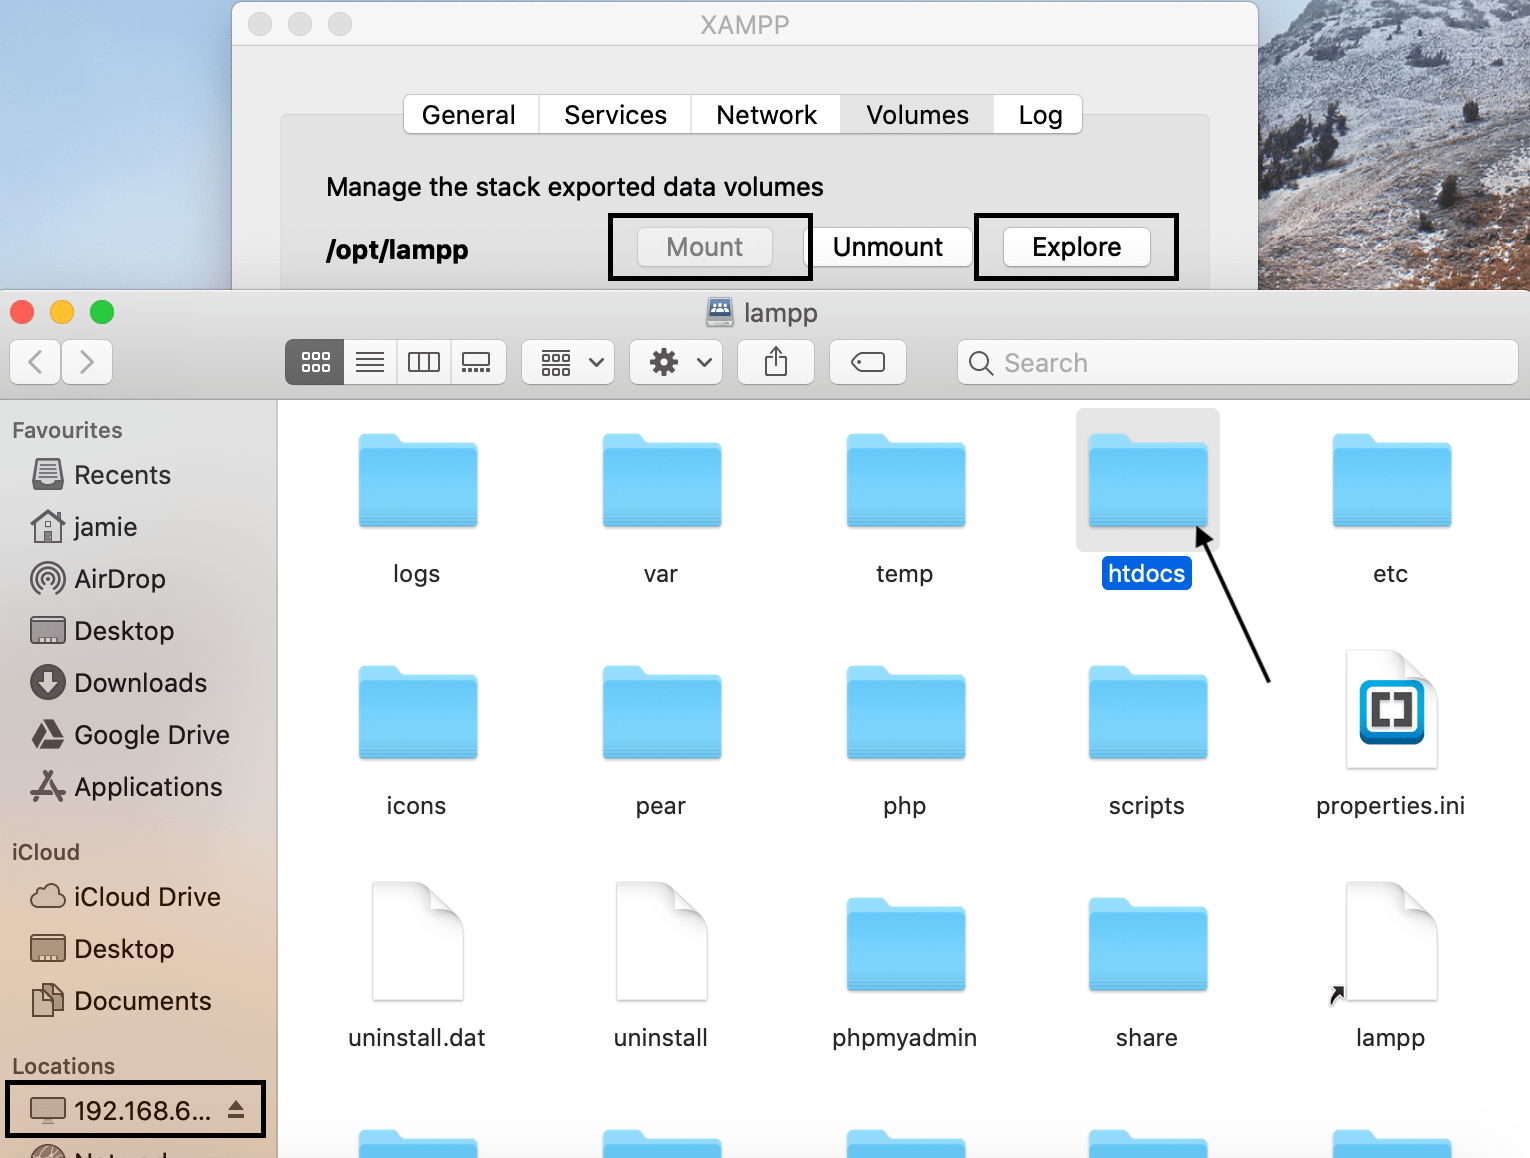
Next, click on the “Volumes” tab to mount the /opt/lampp/ folder. Once that is mounted, you can click Explore to explore this folder. You’ll find htdocs located inside. htdocs is where you should save your PHP scripts to.
Installing Brackets
To install Brackets, go to http://brackets.io/ and click on the “Download Brackets” button to download the application.
Once downloaded, double-click the downloaded file to start the installation.
On Windows, just keep clicking “Next” to finish the installation. Once the installation is over, click on the “Finish” button.
On Mac, drag “Brackets” to the Applications folder when prompted.

Creating and Running a PHP File
Open Brackets and create a new file (File > New). Type the following code into the file:
<!DOCTYPE html>
<html>
<head>
    <title>My first PHP page</title>
</head>
<body>
    <h1>My first PHP page</h1>
    <?php
        #Simple hello world page
        echo "Hello World!";
    ?>
</body>
</html>
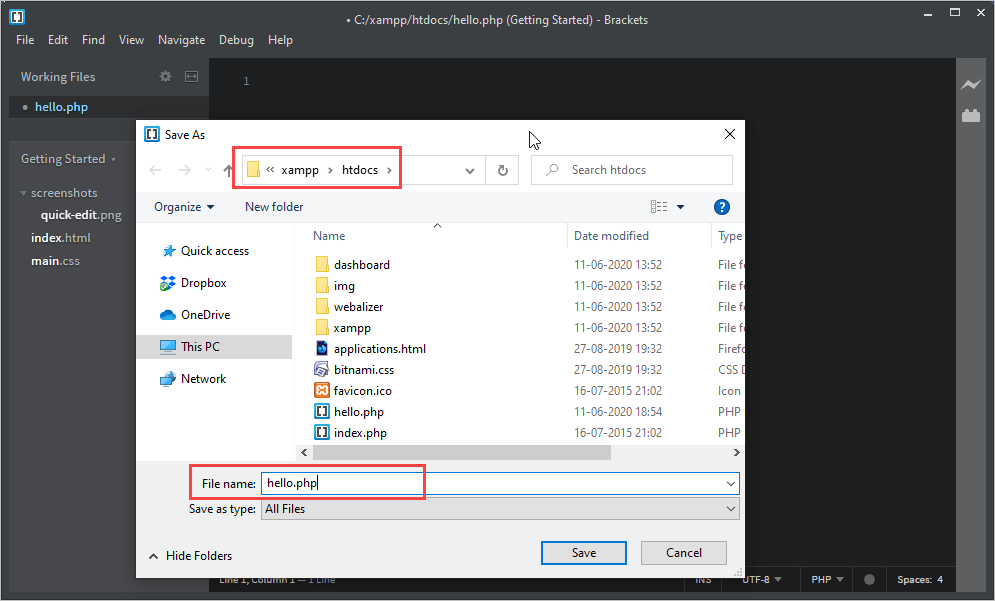
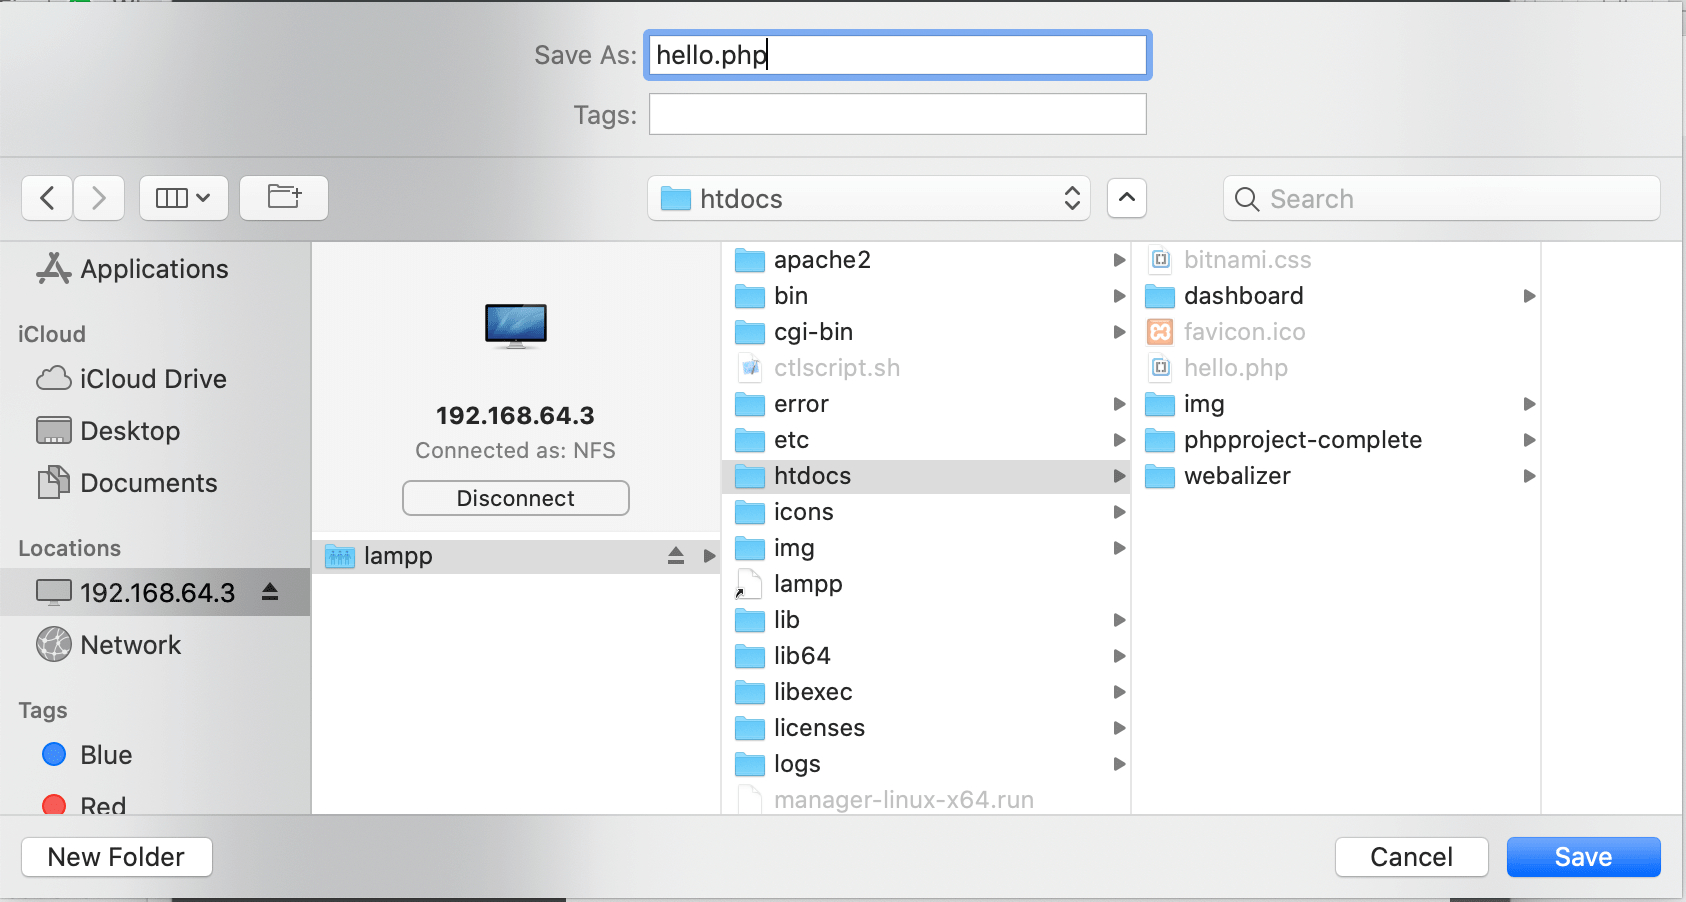
Save the file as hello.php to your htdocs folder.
On Windows, the htdocs folder is located in your XAMPP installation directory (i.e., C:\xampp).
On Mac, htdocs is located in the lampp folder, you need to mount this folder first (refer to the previous section).
To run the file, open the XAMPP Control Panel and make sure Apache is running.
On Windows, type http://localhost/hello.php into your browser’s address bar. (Note: If you have Apache running on a different port, you need to add the port number to the URL as well. For instance, type http://localhost:8089/hello.php if you are using port 8089.)
On Mac, ensure that you have enabled port forwarding (refer to the previous section). If you have enabled “localhost:8080->80”, type http://localhost:8080/hello.php to load the page.
You should see the following output:

Resolving Port Conflicts on Windows (if any)
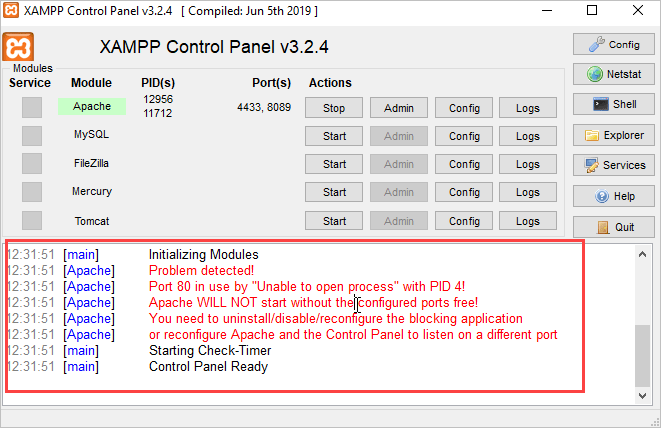
If you experience any issues starting Apache or MySQL in XAMPP, it is likely due to a port conflict.
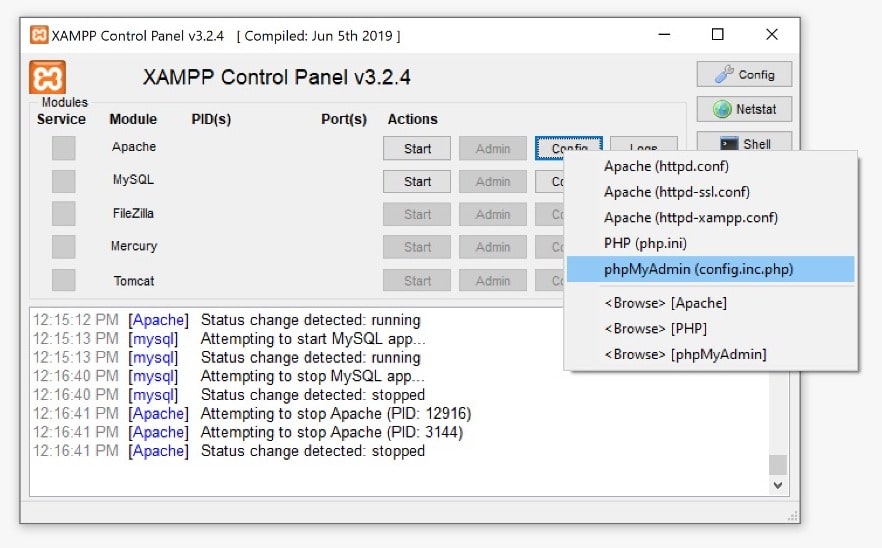
When you install XAMPP, Apache binds to Ports 80 and 443 by default, while MySQL binds to Port 3306. If these ports are currently in use by another service or application, you will get an error message (refer to the screenshot below) when you try to start the service.
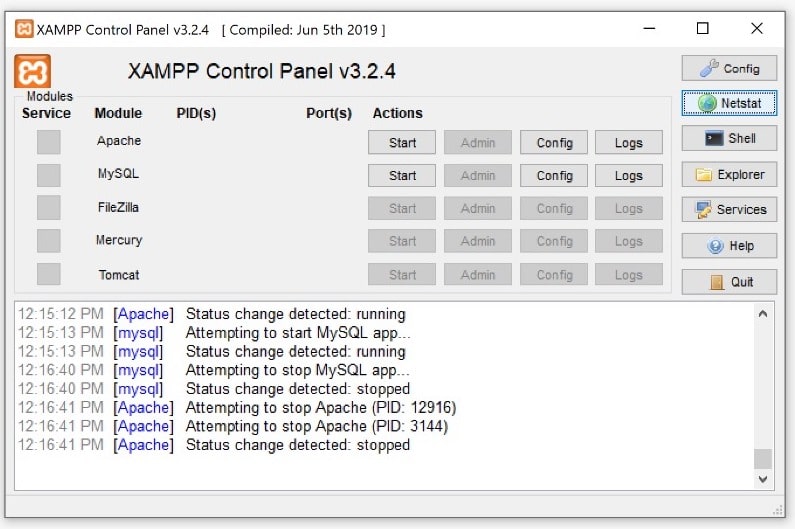
To see which ports are currently in use by another application, click on “Netstat” in the XAMPP control panel:

Resolving Port Conflict for Apache
To resolve any port conflict for Apache, choose a port that is not currently in use. In the tutorial that follows, we’ll use Ports 8089 and 4433.
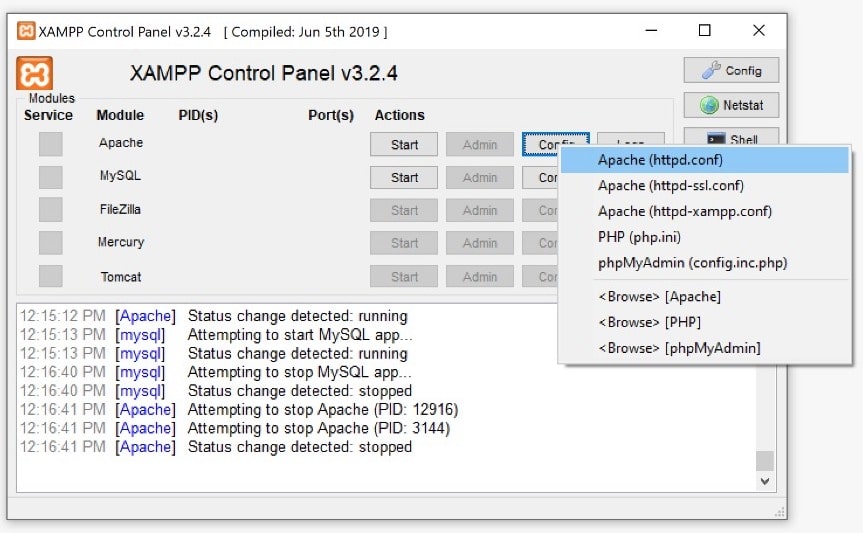
Start the XAMPP control panel and click on the Apache>Config button. Next, select Apache (httpd-conf) and search for Listen 80. Change it to Listen 8089. Finally, search for ServerName localhost:80 and change it to ServerName localhost:8089.

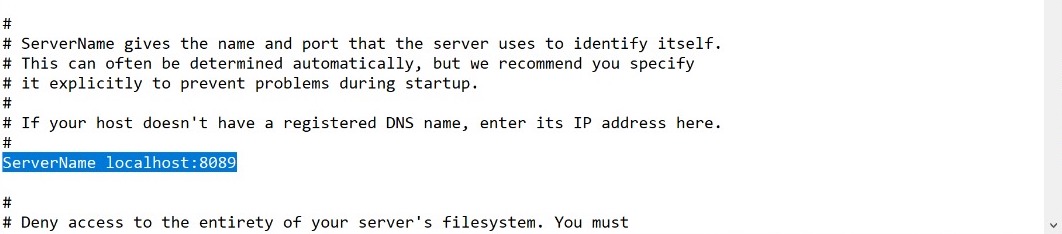
Once the above is done, save the file.
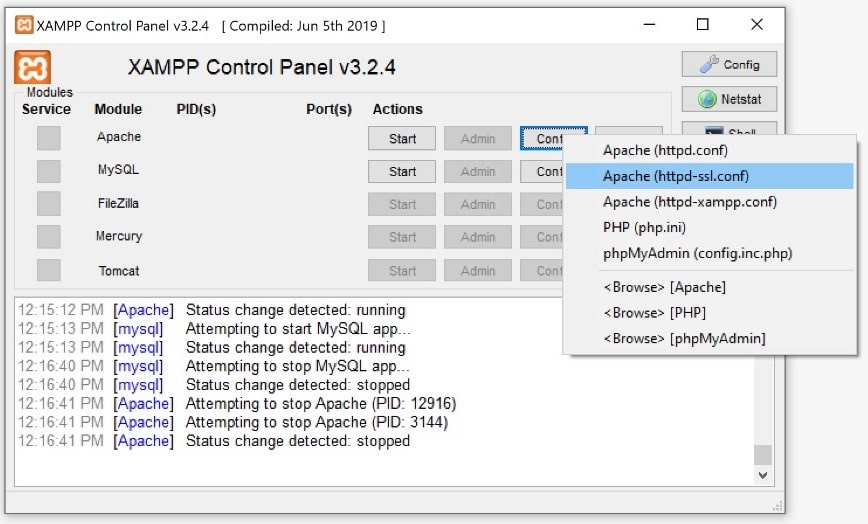
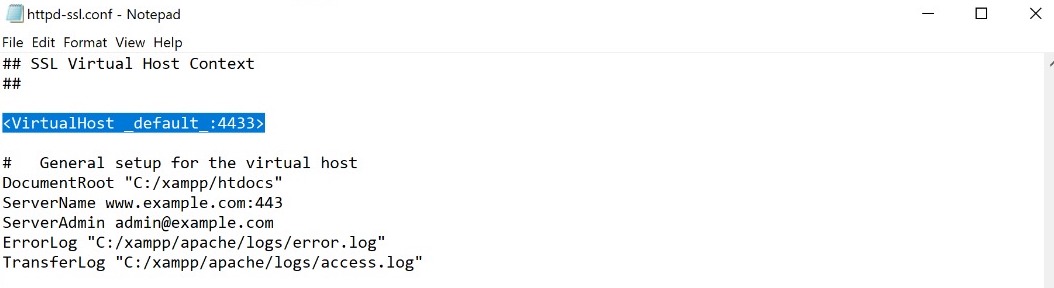
Next, click on Apache>Config and select httpd-ssl.conf. Search for Listen 443 and change it to Listen 4433. Next, search for VirtualHost default:443 and change it to VirtualHost default:4433.

Once that is done, save the file and restart XAMPP.
Loading Files
To load any localhost files now, use http://localhost:8089/ instead of http://localhost/
Resolving Port Conflict for MySQL
We’ll use Port 3305 in this tutorial.
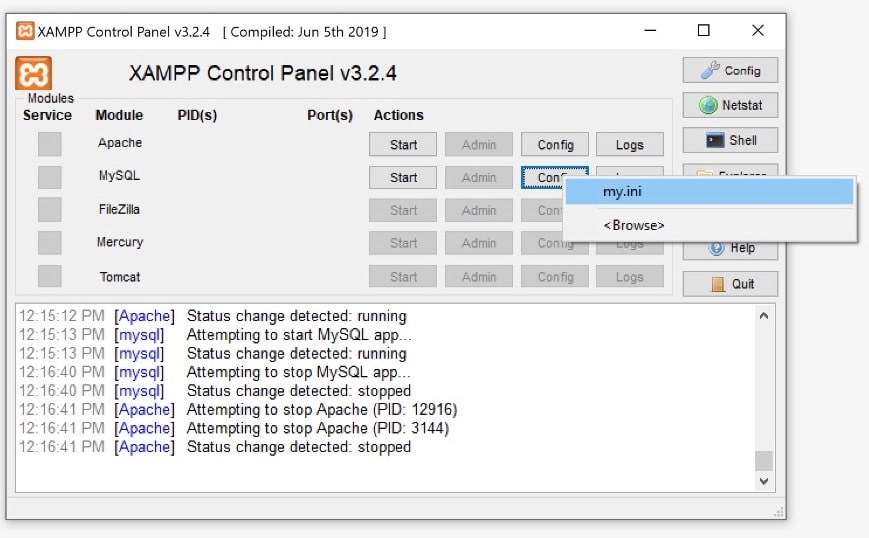
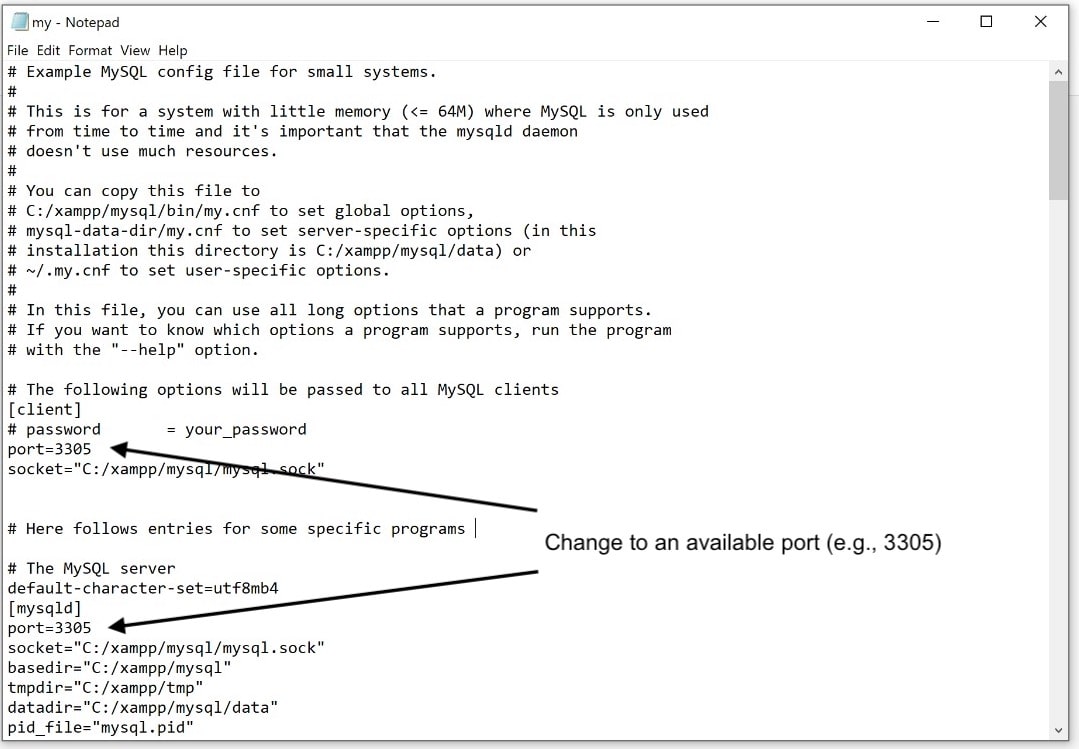
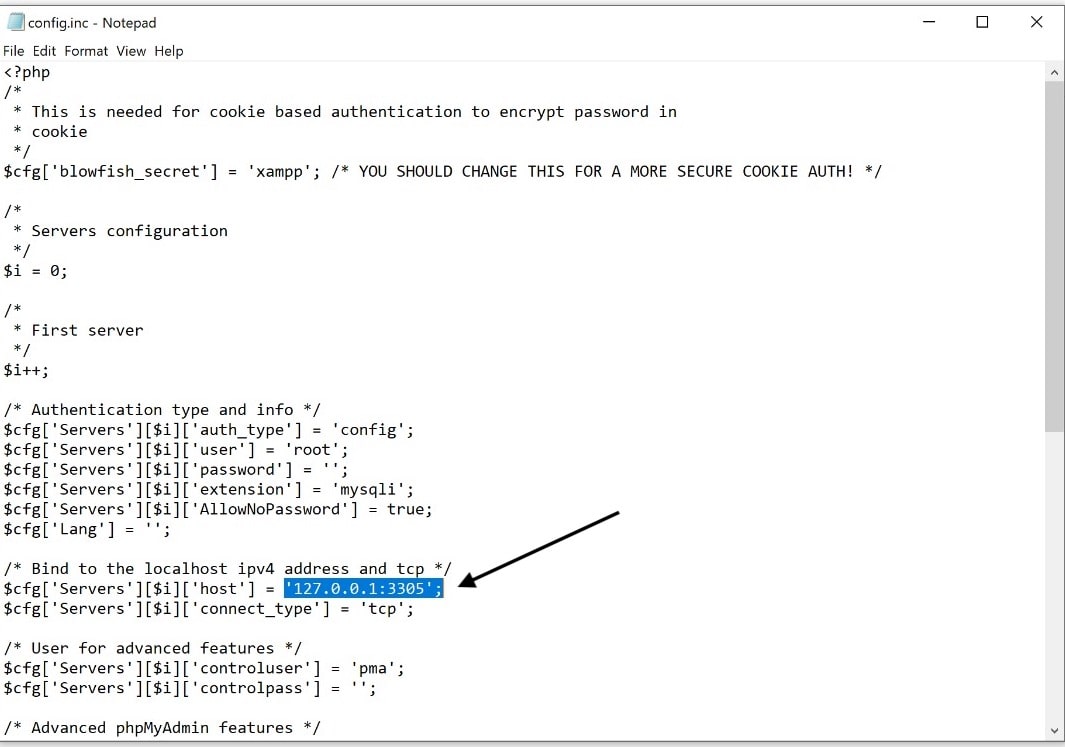
First, start XAMPP Control Panel and click on MySQL>Config. Select my.ini. Change port = 3306 to port = 3305.
Save the file. Next, click on Apache>Config and select config.inc.php. Change 127.0.0.1 to 127.0.0.1:3305 and save the file.
Restart MySQL and you should have no problems starting the service now.
Connecting to the Database
To connect to the database now, the host is localhost:3305 instead of just localhost. For instance, to use PDO to connect to a database called “pawszone”, with “pz_admin” and “ABCD” as the username and password respectively, use the following code:
$pdo = new PDO("mysql:host=localhost:3305;dbname=pawszone", "pz_admin", "ABCD");