
Table of Contents
Installing Anaconda
To install Anaconda, head over to https://www.anaconda.com/products/individual.
Click on the Download button and wait for the download to complete. Once completed, click on the file to start the installation.
If prompted to select any option, choose the default options and click Next to proceed. Installation may take a while, so grab a drink and wait for it to complete; it took more than 10 minutes on my machine.
Launching Jupyter Notebook
Once installation is complete, we can launch Jupyter Notebook using the Anaconda Navigator.
Before we do that, let’s create a new folder called ML Notebooks on our desktop.
Next, look for Anaconda Navigator on your machine and launch it; you’ll be presented with the screen below:
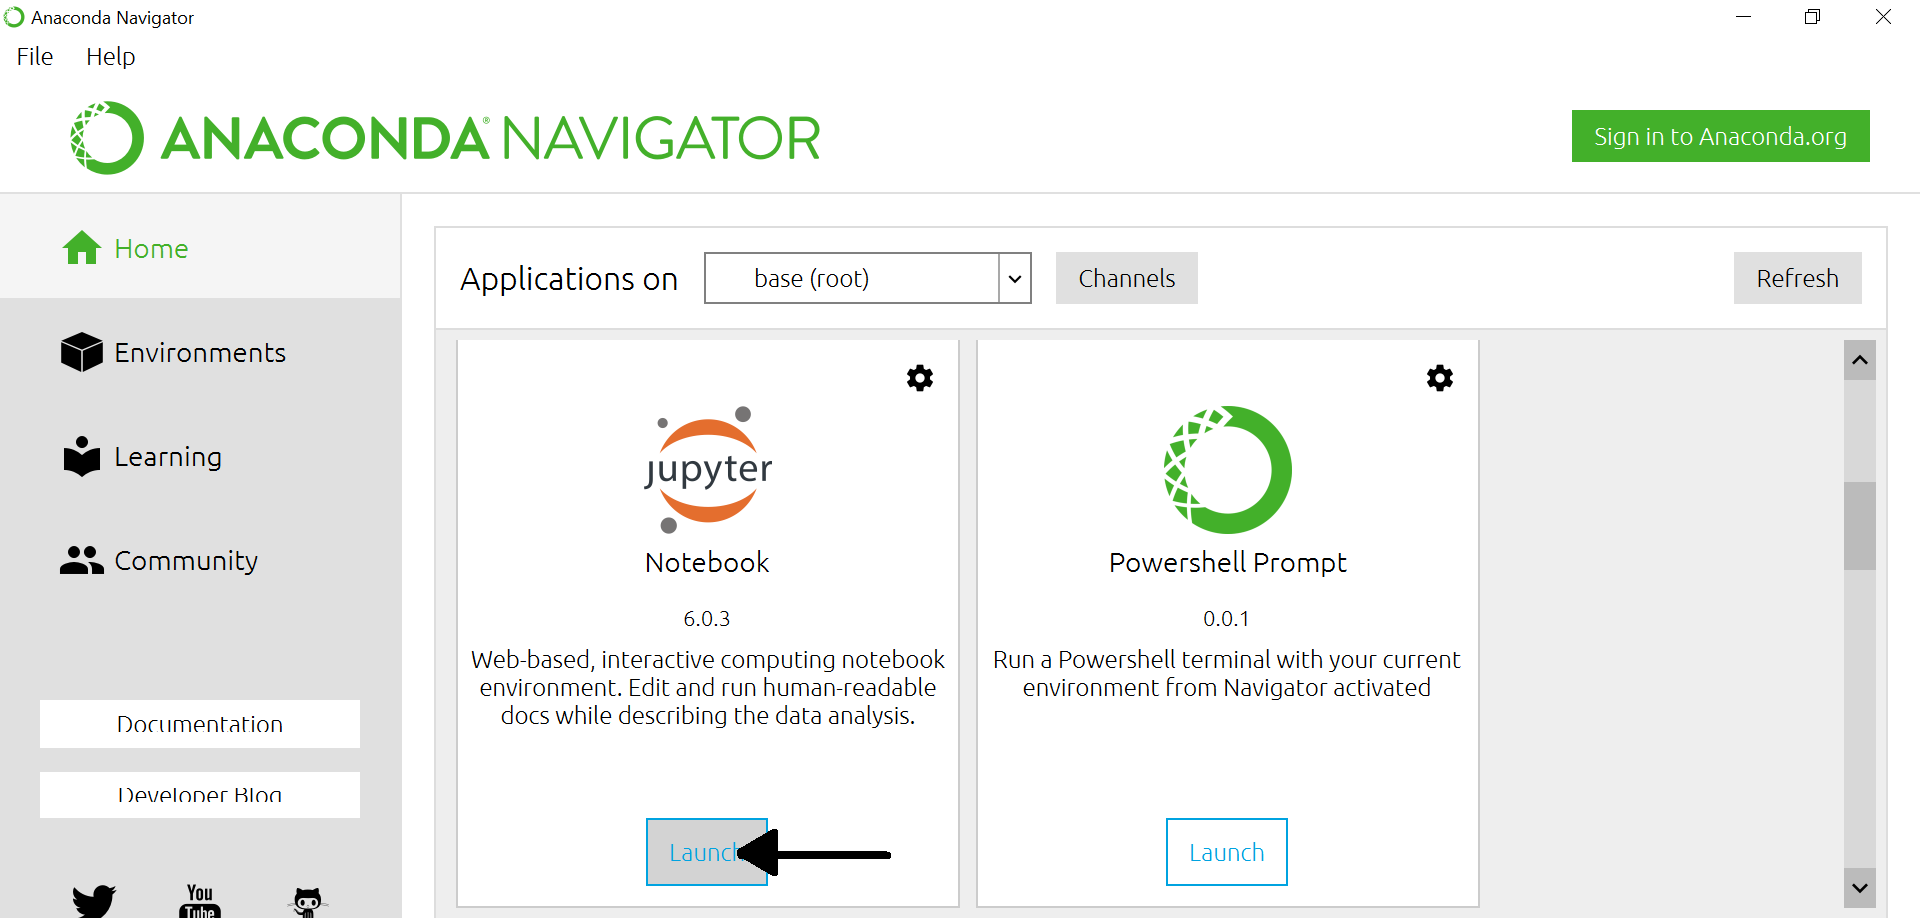
Look for Jupyter Notebook and click on the Launch button.
This launches the Jupyter Dashboard in a browser tab, which lists the folders on your machine. If you are not connected to the internet, you may get an error message that says “Hmm… We couldn’t log you in just now. Check your internet connection and try again.”; you can ignore this message.
Creating a New Notebook
Navigate to your ML Notebooks folder and click on New > Python3. This brings you to a blank Jupyter Notebook document.

Editing a Jupyter Notebook document
Renaming the notebook
Click on ‘Untitled’ to rename the notebook to ‘Examples’.
Adding Code
Next, click on the first cell and add the following code to it:
print('Hello World')Press Shift-Enter to run the code or click on the Run button:
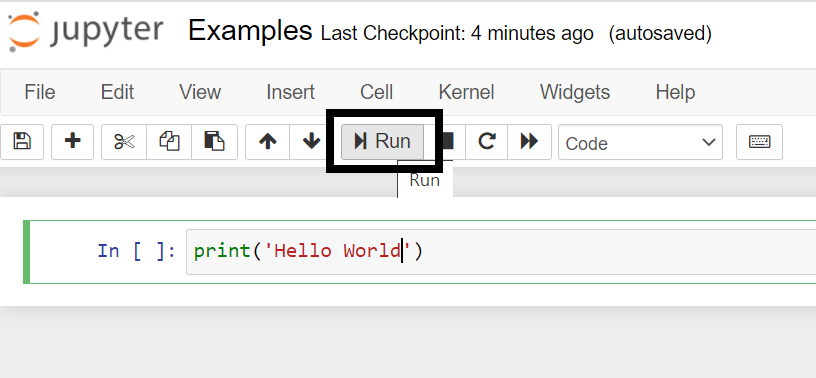
You’ll see the output displayed below the code.
Adding a Cell
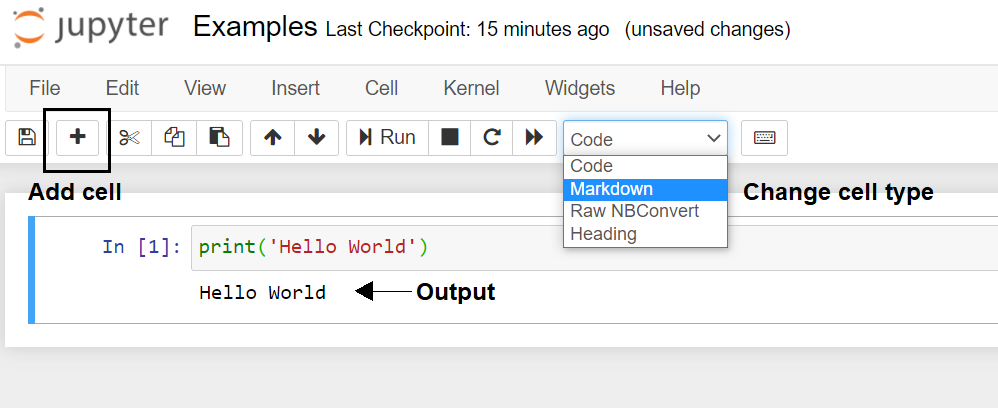
To add a new cell, click on the + button. There are two main types of cells we use – Code and Markdown.
Code cells are for adding code to our Jupyter document and markdown cells are for adding text. You can use the drop-down list to change the cell type:
Adding text
Create a new cell and change it to a Markdown cell. Add the following text to the cell:
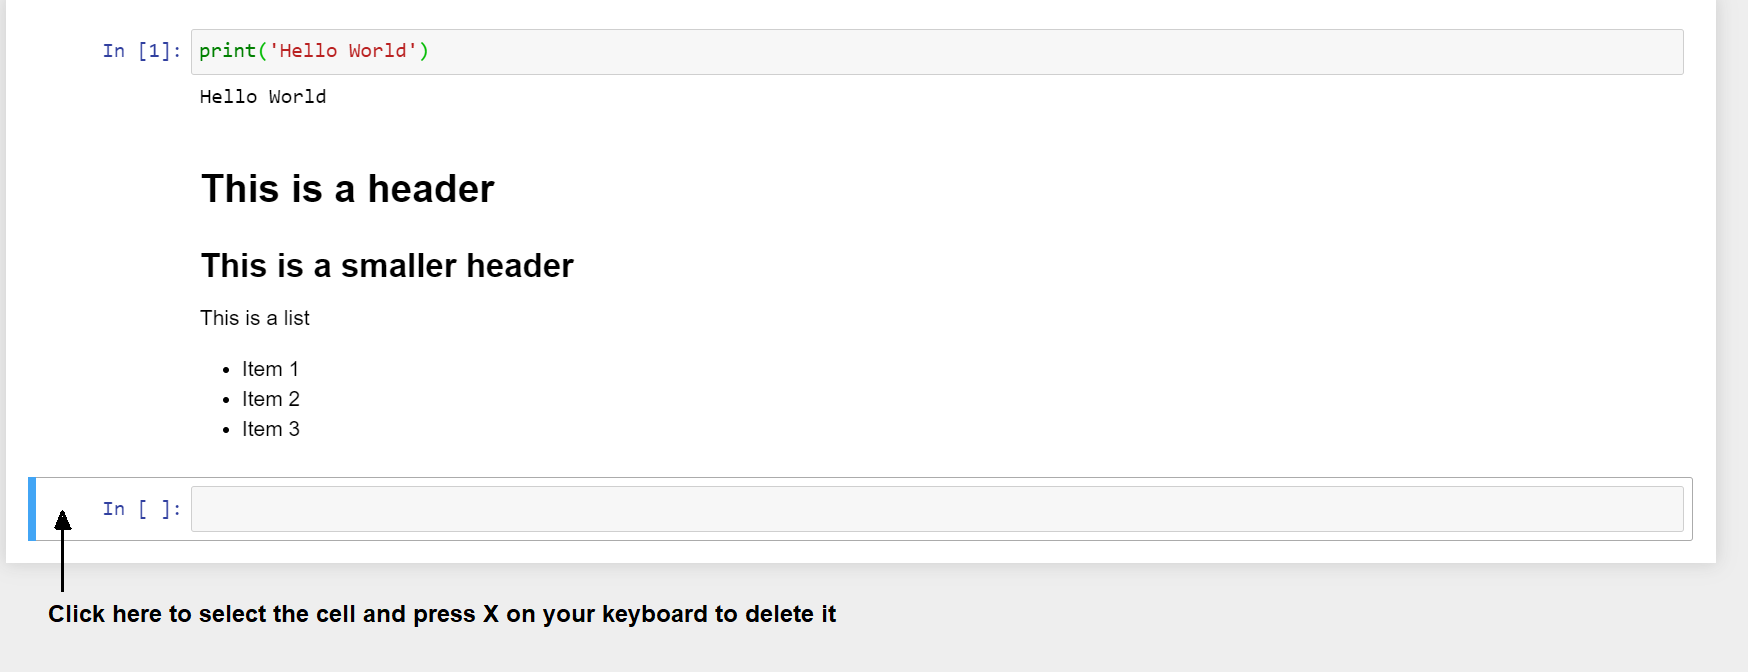
# This is a header
## This is a smaller header

This is a list
- Item 1
- Item 2
- Item 3
We use pound signs (#) to add a header. The more pound signs we use, the smaller the header. The text above gives us the following output when you run the cell:
Deleting a Cell
To delete a cell, click on the cell (outside the grey text field) and press X on your keyboard.
Saving, Closing and Relaunching a Notebook
To save the notebook, click the Save icon or select File > Save and Checkpoint.
To close it, select File > Close and Halt. You’ll be directed to the Jupyter Dashboard. Select Quit to quit the server. You can now close the browser tab and quit Anaconda Navigator (by clicking on the X button).
To relaunch a file, start Anaconda Navigator and navigate to the file using the Jupyter Dashboard. Click on the file to load it.
Running all cells
Most of the cells in a notebook are interlinked. For instance, the last cell may depend on the import statement from the first cell. You can choose to run all cells in a notebook by clicking on the Cells > Run All or Cells > Run All Above in the menu on top.